Thursday, June 11, 2015

Review of Grab Bags


For today's review, we will be chatting about the Grab Bag. These reusable bags have a variety of useful features; they are easy to store, easy to clean and clip on to your shopping cart!  I'm a big fan of reusable bags so I was excited and eager to test this product out.

As I first examined the product it seemed pretty comparable to other reusable bags.  Then I noticed some of the grab bag's other features.  It has plastic clips near the handles which allow the Grab Bag to clip to shopping carts.  The sides of the bag has elastic allowing it to stretch and hold more items.  There is also a velcro strap at the top of the bag which allows the bag to close and stay closed.  

To test this bad boy out, I took one on a grocery trip with me.  The purpose of this shopping trip was to pick up a few essential items for our house, but also grab some treats and snacks because we were heading out of town.  I did my shopping and whipped out my Grab Bag while the cashier was ringing me up. I clipped the bag to the cart so he could bag all the groceries with ease. Just so you get a mental picture, below is a list of items that were put in my bag:

flour
6 pack of beer
chocolate covered almonds
tortilla chips
pita chips
inner peas
salsa
hummus
chocolate bar
4 larabars
carrots
butter
cranberry juice
lemons
chocolate bar


As you can tell, I had a few heavy items in my bag.  I figured the bag would be fine because everything fit. These bags are also supposed to carry up to 40 pounds, and I didn't think I was over the limit with this purchase. Since my bag was heavy, I carried it by the handles, but also supported the bottom with one hand on my way to the car.  As I unlocked my car, about to put my bag in the back seat, one of the handles broke!  Luckily I caught the bag and nothing dropped on the ground--could you imagine if the salsa jar and beer bottles broke all over the ground??!!

Very unlucky that the first time I used this product it broke.  But, I feel as though I helped contribute to that outcome since I had a few glass items in there.  Since I received two Grab Bags in my order, I figured I would give the second a shot.  I decided to take my second bag on our trip and pack a few lighter items.  I didn't have any problems or broken handles when I used the bag this way.

Thinking about this product, I would RECOMMEND the Grab Bag WITH RESERVATIONS.  The concept is well thought out, however, I'm not sure I trust the quality since the first bag I ever used broke.  If a grocery purchase had lighter items I would certainly trust the Grab Bag. I have used my second Grab Bag several times since my first one broke and have had no problems.  Perhaps that first one was a fluke?  Maybe I really had over 40 pounds in my bag?  Either way, I still like my Grab Bag.

There are a few things I would like to see in the future of Grab Bag production:

1. A machine washable version
I'm not sure if this is possible since the clips are plastic.  

2. Different patterns and colors
Cute patterns and colors would make the bag a bit more desirable.

3. Add pockets on the inside
This is one detail I love about some of my other reusable bags.  An internal pocket allows me to secure glass items so they don't roll around in my bag.

If you are a big fan of re-usable bags, you should give the Grab Bag a try!


Wednesday, May 27, 2015

Homemade Coffee Syrups


I don't like coffee.  I wish I did.  Lattes or mochas (basically any drink priced at $3 or more) I can handle, but black coffee, no way.  Going to a coffee shop is a treat for me since I like the fancy drinks... I always think about how much money I could save if I found a way to make these drinks at home.

Another component of these fancy drinks; fancy flavored syrup. I love to add a little flavor to my coffee drinks, but seriously, what are those syrups actually made of??  As much as I love natural products, I always fall victim to the artificial syrups. Ugh.

It's time to bring the coffee shop to my house.  Hopefully I can stop consuming those artificial flavors while saving a bit of money.

The best thing about these syrups is that you can use them to personalize your coffee.  Use them with warm of iced coffee and use as little or as much as you want.  Add milk, non-dairy milk or cream if you like.  Design your own drink!

Chocolate Coffee Syrup
This coffee syrup is rich and think with a velvet consistency.  It tastes like a ganache, and actually has multiple uses.  Put it on a sundae, dip fruit in it, and just eat a spoonful to satisfy a craving.

1/2 cup water
1/2 cup granulated sugar
1/2 cup cocoa


Place all three ingredients in a small sauce pan.  Whisk ingredients together till the cocoa is incorporated.  Turn stove on to medium heat.  Continue to whisk the mixture until it just comes to a boil.  Remove pan from heat and turn off stove.  Continue to whisk for about a minute to make sure none of the syrup burns on the bottom of the pan.  Let the syrup cool and store in an air tight container.  Refrigerate.
*this syrup is reasonably thick, and gets ticker when cold.  If you plan to use in ice coffee, let the syrup sit out at room temperature before using, or place in microwave for a few seconds.


Vanilla Brown Sugar Syrup
This syrup reminds me of what you would use for a vanilla latte.  With the addition of the brown sugar, this syrup has a richer and deeper flavor.

1/2 cup water
1/2 cup brown sugar
1 tsp vanilla

Combine all three ingredients in a small sauce pan.  Whisk ingredients together.  Turn stove on to medium heat.  Continue to whisk the mixture until it just comes to a boil- at this point all the sugar will be dissolved.  Remove pan from heat and turn off stove.  Continue to whisk for about a minute to make sure none of the syrup burns on the bottom of the pan.  Let the syrup cool and store in an air tight container.  Refrigerate.  This is basically a simple syrup, with the addition of vanilla flavor.  If you just wanted the brown sugar syrup, you can leave out the vanilla and it would taste just fine.


Saturday, May 23, 2015

Review of Plumber's Hero

I was recently given the unique opportunity to review products that are "as seen on TV".  You know the ones I am talking about.  Infomercials that are on during the day or late at night- sporting enthusiastic and energetic product salesmen/women.  Oddly magnetic, you can't flip the channel, even if you have no interest or need for the product. Infomercials amaze me and I love to watch them.

Anyway, for today's review we will be looking at Plumber's Hero, the tool that "opens drains instantly".  This item is promoted as a "plumber in a can", and apparently has the ability to unclog sinks, tubs, toilets and even sinks with a garbage disposal.  In order to test this product, I have waited two months to find some sort of clog or drain issue at our house.  For the past two weeks I've noticed that our bathroom sink is draining slower than normal, much slower in fact.  Ahhh, finally a chance to put the Plumber's Hero to the test.

I get out my Plumber's Hero user guide to familiarize myself with the product and directions.  The guide consists of four small pages, two of which are warnings and warranty information.  This means there are minimal directions (including several pictures) making directions clear, easy and concise.  That's a plus one in my book.  Although the directions seemed simple, I made my husband help out just in case :)

He reads the directions as well, just in case my interpretation and paraphrasing is incorrect.  I think he was surprised how easy it was.  We then follow the diagram and instructions for the sink unclogging by placing the sink adapter and Plumber's Hero can over the drain.  We fill the sink with water and then push the can down for one second. There was a loud BOOM, the suction noise of our sink draining followed by a subtle, refreshing orange scent. Immediately we turn the faucet on to test it out, and the sink drained like normal. Could it really be that easy and work that well?  The answer to both questions is yes!

Six months ago we lived in a duplex that constantly had draining issues.  Our sink was always stopped up and the tub turned into a bath during each shower due.  We were constantly buying some form of liquid plumber, but inevitably the clog would come back.  I wonder now if the Plumber's Hero would have done the trick?  If so, we would have saved a fair amount of money because this product is $19.99 and has up to 20 uses.

As much as I endorse this product, I do have two minor questions or concerns.  First, no where in the directions, from what I can tell, is there mention of the water temperature that is to be used with this product.  With many liquid plumbers, the directions say to wash the product down with warm water.  Plumber's Hero makes no mention or specification of the water temperature that should be used.  I guess in this case it does not matter?

Second. Our bathroom sink is tiny and we were barely able to fit the Plumber's Hero can and sink adapter under the faucet.  At first I wasn't sure if we would be able to use it.  Luckily Andrew was able to finagle the can to get it under the faucet.  For all those people out there with a tiny sink...is there any possibility of a smaller version of Plumber's Hero in the future?  I could certainly see this being an issue for people who live in older homes or apartments that have smaller, older appliances.

In summary, we love the Plumber's Hero and would RECOMMEND this item to anyone. My husband was actually sad that we did not have more clogged sinks in our house because he found the product so fun and wanted to continue the un-clogging party.  I guess that's a good sign.

Click here to visit the Plumber's Hero website if you are interested in making a purchase.

Friday, May 8, 2015

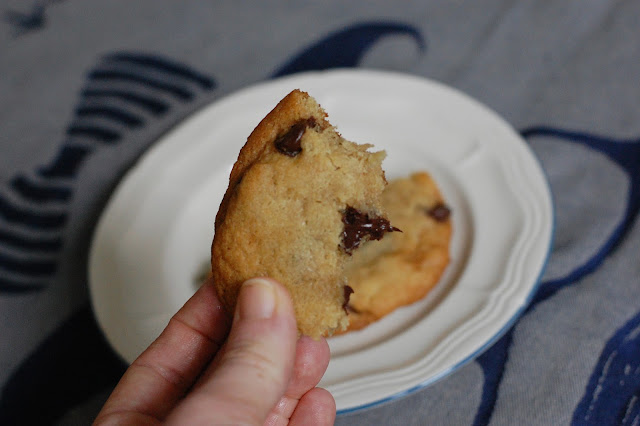
Browned Butter and Sea Salt Chocolate Chip Cookies


I love cookies.  Chocolate chip to be exact.  Honestly, I don't think I could live without them.  If I had to choose my last meal, it would be a fresh batch of chocolate chip cookies.  Andrew actually loves cc cookies as well, so I make them fairly often in our house.  Over the past few years I have started to brown the butter, which adds a richer flavor to the cookie.  Andrew loves them like this, which is why I keep making them.  I guess I happen to love them too.


Ingredients:
*1 cup (2 sticks) of browned butter
3/4 cup brown sugar
3/4 cup granulated sugar
2 eggs
1 tsp vanilla
2 1/4 cup AP flour
1 tsp baking soda
1 tsp sea salt
A dash of cinnamon
1 3/4 cup chocolate chips (add more if you like!)

Preheat oven to 375 degrees.  In an electric mixer, beat sugars and browned butter together until well combined. Add your eggs, one at a time, until fully incorporated. Mix in the vanilla.

In a separate bowl, mix your dry ingredients together (why cinnamon you may ask? Well I love cinnamon, that's why).  Slowly add your dry ingredients until your flour is almost mixed in.

Then add your chocolate chips.  Only mix a few times, you don't want to over mix your batter.

Bake for 10 minutes, flipping your cookie sheet half way through.  If you like crispier cookies add a few minutes.  If you like to make oversize cookies, like I do, you want your total bake time to be closer to 13 minutes.

Adapted from the good old Nestle chocolate chip cookie recipe


*Browning butter*
Let your butter sit out at room temperature for about an hour, this will help the browning process go faster.

Put the butter in a small sauce pan over med heat.  Let the butter melt which may take a few minutes.  Just hang out, it takes some time.

Once the butter is fully melted you will begin to hear the butter crackle and pop.  This is normal, no need to worry.  The butter will then go through some phases.  It will start to bubble and look frothy, then it will be a bit more clear.  Whatever you do, don't walk away!  The butter browns quickly and you don't want it to burn.

Finally you will start to see brown bits in the bottom.  When this happens turn your heat off, but keep the pan on the stove.  Once the brown bits begin to be more pronounced, remove the pan from the stove and transfer the butter to a heat safe bowl or container to cool.  Let cool to room temp before using.


Wednesday, May 6, 2015

Knox's Nursery


Some may know the story, but we had originally intended not to find out the (Knox's) gender. Well at 28 weeks we went to the doctor for a routine appointment.  Our normal doctor was out so we had to see another doctor in our practice and this other doctor slipped the gender... or what we thought was the gender. This doctor walked into the room, looked at our chart, then walked up to me and asked "so y'all are having a girl right?"

Whatttttt, who says that??!!!

To make a long story short, we decided it would be wise to confirm the gender with our normal doctor since we thought the baby could be a girl, but were not positive.  At our next appointment we checked with our doctor and found out that we were actually having a boy.  We were both so surprised based on our previous appointment.  Since we found out at 30 weeks and had already registered for all gender neutral items, we decided that we wanted to keep the gender a surprise.  Most of our family and friends were aware of the story and were dying to know the gender.  It was so hard to not slip, but we thankfully didn't (a few friends may have figured it out) and everyone was surprised when Andrew walked out of the hospital room to deliver the news.

The funny thing about our nursery is that I picked out all the bedding, when I thought we were having a girl.  I tend to like more neutral/masculine colors, and figured I would add a bit of pink once the baby arrived.   Below you will find pictures of the nursery, along with details about its contents. Pictures from the fabulous Rebecca of Rebecca Lynn Photography.


- Crib from Ikea, painted with Annie Sloan chalk board paint
- Bumper, sheets and blanket from the PB kids preston collection
- Zinc letters from Anthropologie
- Gray and white pouf from Kohl's
- Changing table baskets from Land of Nod
- Changing pad cover
- Half tone rattan floor basket
- Rug from PB kids
-Pinocchio pictures from our trip to Italy last year, painting made by a friend's mother and mobile made by a good friend.


Monday, April 20, 2015

Rebecca Lynn Photography


I'm so excited to share more of our newborn pictures and tell you all about Rebecca Olson, the talent behind Rebecca Lynn Photography.  I'll be honest, I was very apprehensive and nervous about taking newborn pictures.  Being camera shy, I was not very interested in the concept of newborn pictures and the non-sentimental side of me didn't understand the point.

Remembering our engagement and wedding photography sessions, the photographer makes all the difference.  Yes, talent is important.  But comfort with the photographer trumps all (in my opinion).  What made our newborn photography session so incredible was Rebecca's calm, sweet demeanor.  Obviously, she takes incredible pictures, but Rebecca also has a quiet confidence and commanding presence behind her camera.  She is so relaxed and personal that you kinda want her to stop taking pictures of your baby and hang out with you...or at least that is how I felt.  Aside from being incredibly professional and personal, she loves the babies.  She loved holding, swaddling and comforting Knox.  As she took pictures I would leave the room, let her do her thing, and come back in the room to find her comforting Knox and just loving on him.  You can tell Rebecca truly loves her job, and her clients (the babies that is).

After Rebecca left our house, I was so thankful for the experience.  It was so sweet to spend time with Knox and Andrew and have someone capture those new and tender moments of us as a family. Looking back, I don't think I would have been able to handle the session if Rebecca was not our photographer- she made it so easy and seamless.  When we got our pictures back, I was overjoyed that we had decided to take these pictures.  At the time Knox was only a week old.  Now he is almost six weeks old and he has changed so much and we have Rebecca to thank for capturing such amazing, natural pictures of him!


Wednesday, March 25, 2015

Newborn Photography


Have you ever, or do you plan to get newborn portraits done?  Honestly, the thought never crossed my mind till I was approached by a friend who is a photographer. A newborn photographer at that.  Even after we decided to get the pictures done, I had no idea what to expect.  Would Knox be posed in a quizzical position wearing a bear costume??  Or would he be sitting in a basket swaddled in a blanket holding an ice cream cone (this image comes to mind)?  I guess I have been looking at newborn announcements at the doctors office for months and have seen such a wide variety of photography styles.

I'm not going to speak too much about the experience, I will do that in a later post.  However, I wanted to give a sneak peak at some of the photos.  When the rest of the photos come in, I can tell you all about our photographer, her style and our experience!